Short answer: battle jacket patches are arranged in clear zones, anchored by one large backpatch on the back panel, with the front split between the left chest and right chest, and smaller pieces stepping down the sleeves and side panels. Nobody issues a rulebook, but the placement follows a real convention borrowed from military insignia, and following it makes a first build look deliberate instead of accidental.
Most of the trouble people hit comes from starting with the wrong patch. Veteran builders on r/BattleJackets keep repeating the same advice: wait until you have the backpatch before deciding anything else, because its size and colour scheme dictate the whole composition.
Below is the process I would follow, from measuring the garment through to the last inspection, whether you are working on denim, leather, or a sleeveless vest.
Table of Contents
- What You Need
- Step-by-Step: Plan and Attach Battle Jacket Patches
- 1. Measure the jacket and establish its visual center
- 2. Group patches by size, meaning, and visual weight
- 3. Choose a balanced layout for the garment panel
- 4. Test how to battle jacket patches are arranged before stitching
- 5. Transfer the layout and prepare each patch
- 6. Sew the patches firmly and inspect the result
- Common Mistakes
- Quick Tips for a Professional Finish
- Frequently Asked Questions
- What order should battle jacket patches be attached?
- What is the most meaningful position on a battle jacket?
- Should the back of a denim jacket be completely covered with patches?
- Can you sew patches onto a leather battle jacket?
- How do I fix a patch that was sewn on crooked?
- How do you clean and care for a patch-covered battle jacket?
- Conclusion
What You Need
The garment comes first, and it matters what you are working with. Denim takes thread cleanly and hides holes, leather does not forgive a single misplaced puncture, and a vest has no sleeve real estate at all so everything shifts inward toward the chest panels.
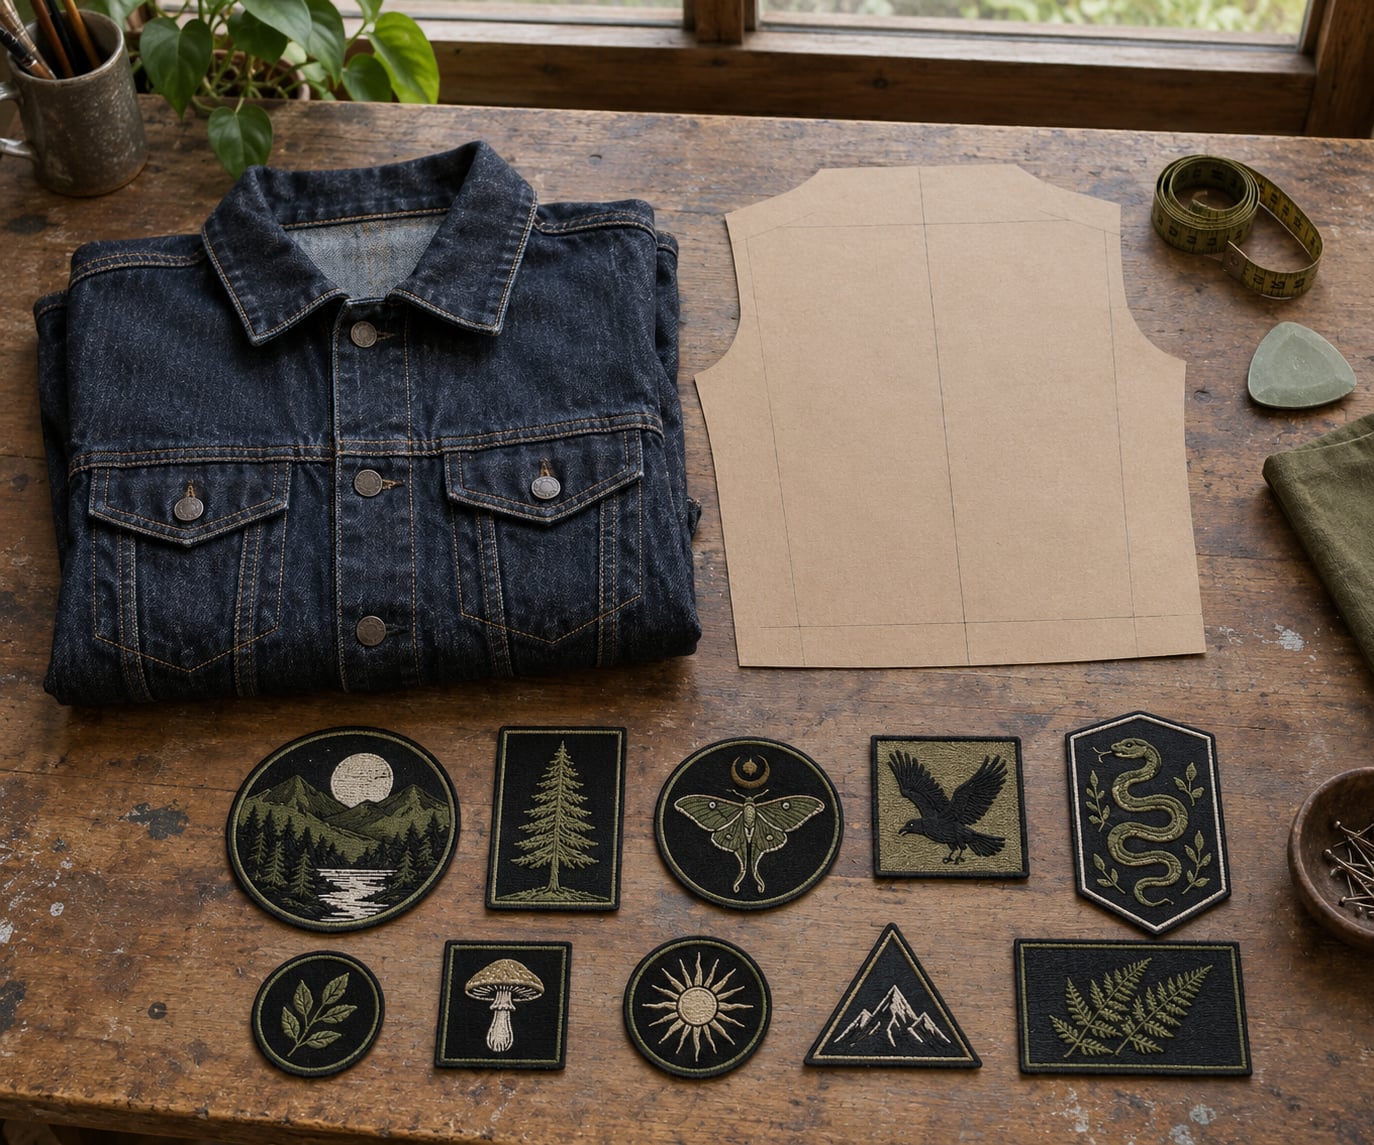
- The jacket or vest in the size and colour you will actually wear. Try it on over what you wear to shows before you mark anything.
- Your patches, sorted, with the largest one first. Backpatch, then medium pieces, then small fillers.
- A tape measure and a pencil or chalk for marking. Chalk marks rub off denim less easily than pen.
- Painter’s tape or low-tack tape for the mock-up stage.
- Paper, cardboard, or a printed photo mock-up cut to the exact size of each patch.
- Straight pins or safety pins for auditioning positions without committing.
- Needles rated for the fabric: 90/14 sharp for denim, 90/14 ball point or a leather needle for leather and coated patches.
- Heavy thread in a tone that matches the patch border, plus a thinner tacking thread if you plan the lining method.
- Optional stabilizers: a small square of fusible backing for tiny patches on smooth or leather shells, and a pressing cloth if you use iron-on adhesive.
On denim versus leather: denim is forgiving and rewards a straight machine stitch. Leather needs a sharper needle, slower feed, and a lighter hand, because every hole you make is permanent.
Step-by-Step: Plan and Attach Battle Jacket Patches
1. Measure the jacket and establish its visual center
Lay the jacket flat, buttoned, and smooth out the back panel with your palms so you are measuring the garment as it sits rather than as it lies on the table. Most people get a layout that looks centered flat and then sits crooked on the body, and this is where that happens.
Mark the vertical center line of the back panel from the collar seam down to the hem. Then measure across: back panel width at the yoke, shoulder seam to shoulder seam, and each sleeve separately. Write the numbers down instead of trusting your eye.
Note the front opening. On a button or zip front, a patch wider than the placket will fold or break its image when the jacket is closed, so front patches should stay inside one chest panel.
The vintage leather jacket crowd centres a chest patch on a cross point: measure horizontally from the centre of the front closure to the inner sleeve seam, and vertically from the bottom tip of the collar to the top of the chest pocket. Where those two measurements intersect is your patch centre, whatever size the patch is.
2. Group patches by size, meaning, and visual weight
Sort into four piles before you touch the garment: anchor patches, medium chest pieces, small fillers, and sleeve pieces. This is quick and it is the step most people skip, which is why so many jackets look random.
Anchor patches are the pieces that read from across a room. If you have a true backpatch, it is your anchor. If you do not, the largest, highest-contrast patch plays that role, and it belongs on the back.
Meaning matters as much as size. Decide now which patch means most to you, because that is the one you want closest to the heart on the front. A memorial patch, a patch for the band that started it, a patch from a show you will never forget — those usually belong where they stay visible.
3. Choose a balanced layout for the garment panel
Back panel first. A large rectangular backpatch usually sits with its top edge just below the back yoke seam, centred on your vertical line. Do not force it over the yoke seam, and do not run it down past the shoulder blades, or it will bunch when you sit.
Then build around the back rather than over it. Supporting medium patches stack above and below the anchor, and the panel between the seams stays deliberately tight so there is room for patches you have not bought yet.
| Zone | Typical patch size | What to avoid |
|---|---|---|
| Back panel (anchor) | 10-14 in wide by 12-16 in tall | Forcing it over the yoke seam; running below the shoulder blades |
| Back supporting | 3-6 in | Swallowing the anchor; crowding the side seams |
| Left chest | About 3 x 4 in | Patches crossing the front closure or the chest pocket |
| Right chest | About 3 x 4 in | Matching sizes competing for the same visual weight |
| Pocket flap | 2-3 in wide | Anything stiff enough to stop the pocket opening |
| Upper sleeve | 2-4 in | Crossing the elbow or the shoulder seam |
| Side panel | 3-5 in | Anything close to the underarm, where it stretches |
Sleeves take the smallest work. The upper sleeve reads at conversation distance, so it suits tour and scene patches. Keep patches off the elbow crease, off the underarm, and clear of the sleeve hem. On a vest with no sleeves, move that same material to the side panels and the upper chest.
Two composition styles dominate. Symmetrical layouts, roughly mirrored across the centre line, look sharp and classic. Asymmetrical layouts look punk and personal. Both work as long as the visual weight balances — a lopsided layout with one large patch on one side and three small ones on the other reads as an error even when it is deliberate.
Keep pockets and zippers usable from the first layout, not as an afterthought. A wide, stiff patch sewn across a pocket flap can stop that pocket opening entirely, which is the single most common complaint in patch-placement threads. Keep the top edge of chest patches above the pocket, or entirely below it.
4. Test how to battle jacket patches are arranged before stitching
Cut paper or cardboard templates to the exact dimensions of each patch. Tape them to the jacket and photograph the result from the front and back, then stand back six to eight feet and look at the photo. That distance is where the jacket is usually read, and it is where a muddy layout gives itself away.
Paper beats memory here. If you like what the photo shows, the pinned arrangement will sew the same way.
A few things to check at this stage: no patch overlaps another unless you want the top one to hide the bottom one permanently; nothing runs onto a seam, zipper, snap, or pocket edge; every text patch can be read without tilting your head; and the left and right halves balance when you squint at the photo.
5. Transfer the layout and prepare each patch
Once the mock-up is approved, transfer positions with chalk on the inside seams and a small stitch line or pin mark on the shell. Mark the centre of each patch, not just the corner, so you can correct rotation.
Check the orientation of every word and logo before the needle goes in. This is the mistake people regret most, because a text patch sewn upside down usually has to be cut off to fix.
Trim edges only when a patch genuinely will not fit between seams. If you trim, keep the cut on the border rather than through artwork, and remember that a trimmed patch cannot be re-displayed on a wall later. For very small patches on smooth denim or leather, a square of fusible backing on the reverse helps the stitch bite instead of just pulling out.
If the patches are new dark denim or raw-edged, wash the garment alone first. Blue dye transfer onto pale patch borders is permanent, and it shows up weeks later when you least expect it.
6. Sew the patches firmly and inspect the result
Pin or tack first, then sew. On denim, a short machine stitch around the border with a consistent seam allowance — roughly an eighth of an inch — gives the flattest, most professional result. Stop and sew through thick seams rather than forcing the fabric under tension.
On leather, hand stitch or machine stitch slowly with a leather needle and press the foot down hard. Experienced leather builders tack through to the lining with a light-coloured thread while holding the shell and lining aligned as if the jacket were being worn, finish the visible stitch, then snip the temporary threads. It sounds fussy and it is what keeps the lining from pulling out of line.
Start and end each run with a backstitch or a small knot buried in the seam allowance. Hidden backstitches at the corners stop the corners from lifting, which is where most patches eventually start to peel.
Finish with a full inspection in good light: loose threads trimmed flush, no puckering around a seam, no lifted corners, and every text patch upright. Then wear the jacket for a full day. A patch that rides up when you sit is usually sitting too low on the back.
Common Mistakes
Crowded layouts. The back panel ends up edge to edge with no breathing room. Fix: leave at least half an inch of visible jacket between patches and around the outer edge, and accept that a dense jacket fills in over years.
Inconsistent spacing. Rows drift because each patch was pinned by eye. Fix: mark the seam lines and a consistent spacing allowance with chalk before you pin anything.
An oversized focal patch. A backpatch wider than the panel has to be trimmed, and the artwork gets cut. Fix: measure the panel first and buy to that measurement.
Unstable placement. Patches sewn over a seam, zipper, or snap lift at the corners within weeks. Fix: keep a quarter inch clear of any hardware or seam ridge.
Distorted edges. Sewing around a thick seam allowance or a curved armhole makes the border ripple. Fix: split the stitching into two runs at the seam so the fabric can lie flat on each side.
Visible thread colours. Contrasting thread reads as unfinished on most patch borders. Fix: match the thread to the border colour, not the jacket, and switch if the patch has two borders.
Ignored reinforcement. Patches on the elbows, underarms, and pocket flaps wear through fast. Fix: use a small backing square, or move the piece somewhere the garment does not flex.
Quick Tips for a Professional Finish
Photograph every stage. A layout you liked before sewing is the reference you use later when a new patch arrives and something has to move.
Coordinate quietly. A layout reads as deliberate when the value range is consistent — one dark anchor, mid-tone supporting pieces, small bright accents. Judge it in grayscale before you judge it in colour.
Check the layout from three distances: arm’s length for detail, six to eight feet for overall balance, and a mirror for how it actually looks on you.
Expect to move patches. Nearly everyone who builds one of these ends up rearranging as new patches arrive. Treat that as part of the process rather than a failure, and keep a photo of the old layout so you can find your way back.
For heavy customisation, leave the inside alone once you start. Every patch sewn through to the lining makes the next removal harder, so plan for the long term before you add the twentieth one.
Frequently Asked Questions
What order should battle jacket patches be attached?
Anchor patch first, then everything else. Sew the backpatch before any other piece, because its size and colour set the scale and contrast for the whole jacket. Next come the two front chest patches, then the sleeve pairs, then small fillers and pocket flaps. Saving fillers until last means you fit them into gaps you actually have instead of the gaps you thought you would have.
What is the most meaningful position on a battle jacket?
The back panel carries the most weight because it is the largest surface and the first thing anyone sees behind you, so your main band or the patch that means most goes there. On the front, the left chest is the heart side and traditionally holds the most significant piece. Beyond that the reading is personal, and plenty of builders place whichever patch they care about most on the sleeve instead.
Should the back of a denim jacket be completely covered with patches?
No, and a fully covered back panel causes two problems. There is nowhere left to add the patch you will find next year, and edge to edge coverage leaves no visible jacket between pieces, which flattens the composition. Keeping about half an inch of denim between patches and around the outside edge makes the layout read as intentional, and it keeps the back panel from bunching when you sit.
Can you sew patches onto a leather battle jacket?
Yes, and experienced builders do it regularly, but leather is far less forgiving than denim. Use a sharp leather needle, a presser foot you can push down hard, and slow stitching, because every needle hole is permanent and will stay if a patch ever moves. Backing patches and hitting the lining with the needle only at corners and midpoints keeps the reverse cleaner and easier to repair later.
How do I fix a patch that was sewn on crooked?
On denim, unpick the stitches from underneath with a seam ripper, lift the patch, and re-sew it. The holes stay but fade into the weave, and small patches usually need no further work. Do not cut the patch off unless you have to. On leather, the holes cannot be hidden, so leave a crooked patch in place more often than not, or cover it with a new patch slightly larger than the old one.
How do you clean and care for a patch-covered battle jacket?
Turn it inside out if the lining is clean enough, use cold water and a mild detergent, and skip the dryer. High heat curls patch edges and shrinks printed ones. Iron on the reverse through a pressing cloth if the patches need reshaping, and never iron directly over embroidery. Air dry flat, and store hanging so the weight of the patches does not distort the shoulders.
Conclusion
There is no rulebook behind how to battle jacket patches are arranged, but the convention is consistent enough that following it will save you the rework most first builds need. Sort your patches by size, measure the jacket flat with the centre line marked, pick the anchor patch, and lay out everything else around it.
Mock the layout up in paper before any needle goes through the shell. Photograph it, check it from across the room, and only then start sewing. That single extra evening is the difference between a jacket that looks planned and one you are still rearranging next spring.