To set turntable tracking force, you do two things: float the tonearm until it rests level with anti-skate at zero, then rotate the counterweight in small increments until a gram gauge under the stylus reads the value your cartridge maker recommends. Ten minutes of work, and the difference in sound is immediate.
If you’ve wondered how to set turntable tracking force without fighting a manual for an evening, here is the version I would give a friend. The order matters more than any tool you buy, because the balance step is what creates the zero reference the dial counts from.
Get it wrong in one direction and the stylus rides up the groove wall, mistracks, and skips. Get it wrong in the other and you grind grooves a little faster with every side. Both are fixable in a few minutes, as long as you know what number you are aiming at.
Table of Contents
- What You Need
- How to Set Turntable Tracking Force: Step-by-Step
- 1. Check Your Cartridge’s Recommended Tracking Force
- 2. Level the Turntable and Position the Tonearm
- 3. Set the Counterweight to Zero
- 4. Set the Tracking Force
- 5. Check Cueing, Playback and Skidding
- If Your Turntable Has No Counterweight
- Common Mistakes
- Frequently Asked Questions
- What is a good tracking force for a turntable?
- What happens if the tracking force is too light?
- What should counterweight be set at?
- What should my anti-skate be at?
- Does a turntable have to be perfectly level?
- Do I have to reset tracking force for every record?
- Conclusion
What You Need
You do not need a lot. Most people already have two or three of these items within arm’s reach.
- Your turntable and its manual. The manual tells you where the anti-skate dial and the tracking force scale sit on your specific arm.
- The cartridge specification sheet. This is the number that matters. It lists a recommended tracking force, usually as a range in grams.
- A digital stylus gauge. An inexpensive one that reads to 0.01 g removes all the guesswork. If you do not own one, the built-in dial or the gauge your turntable shipped with will usually get you inside the maker’s range.
- A spirit level, or the flat edge of a known-straight object such as a steel ruler.
- A clean, lint-free cloth for handling the cartridge and cleaning the stylus.
Audio-Technica, Pro-Ject and most other manufacturers publish the cartridge force range in their support documents, and it is normally printed on the box or the paperwork packed with the cartridge. Find that sheet before you touch the counterweight, not after.
A gauge is useful but not required. Plenty of turntables ship with one: Pro-Ject, for example, supplies a gauge you place on the platter with a mark reading 23, which corresponds to the counterweight position that gives 23 g on the arm’s scale.
How to Set Turntable Tracking Force: Step-by-Step
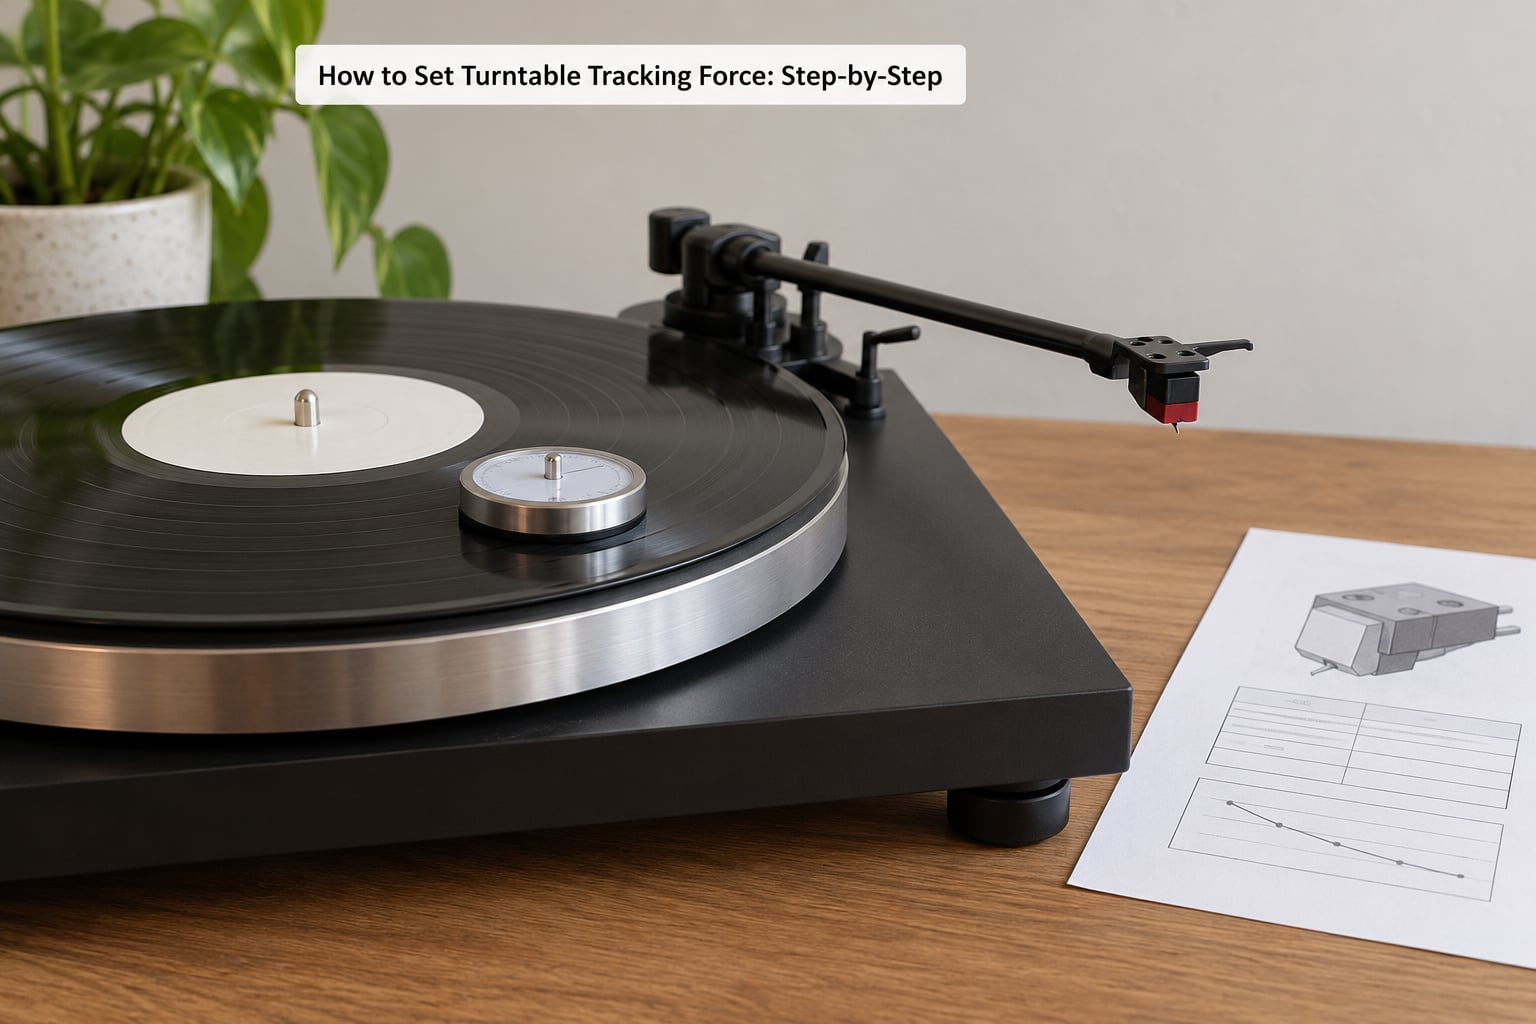
Work through these in order. Ten minutes now saves you an evening of chasing a problem later.
1. Check Your Cartridge’s Recommended Tracking Force
Look up the maker’s recommended range and pick a starting value, usually the middle of the range. A cartridge specified at 1.8 to 2.2 g is happy anywhere in that window, so start at 2.0 g.
Do not copy the setting from a different cartridge, even one in the same turntable that you found set up nicely. Stylus shape, cantilever stiffness and the arm’s effective mass all change what the number means.
And do not assume your tonearm’s scale reads in grams. On most arms the numbers are a reference scale, and the same numeral means different forces on different arms. That is why a gauge helps, and why the range from the cartridge maker is the anchor.
2. Level the Turntable and Position the Tonearm
Put the deck on a surface that does not wobble, then check it with the level on the platter. A small tilt does not ruin tracking, but it pushes the arm sideways and makes every later reading harder to interpret.
Most turntables have adjustable feet for exactly this. Correct the tilt at the feet rather than shimming the back of the plinth, because a shim is what shifts when somebody bumps the table.
Raise the arm rest, turn the anti-skate dial to zero, and lift the tonearm off the arm rest so the arm hangs freely. Take the stylus guard off if your cartridge has one, or leave it off, since a guard adds weight you cannot calibrate around.
Set the speed to match the record while you are there, 33 for an LP and 45 for a single. It has nothing to do with tracking force, but it is the other adjustment people put off.
3. Set the Counterweight to Zero
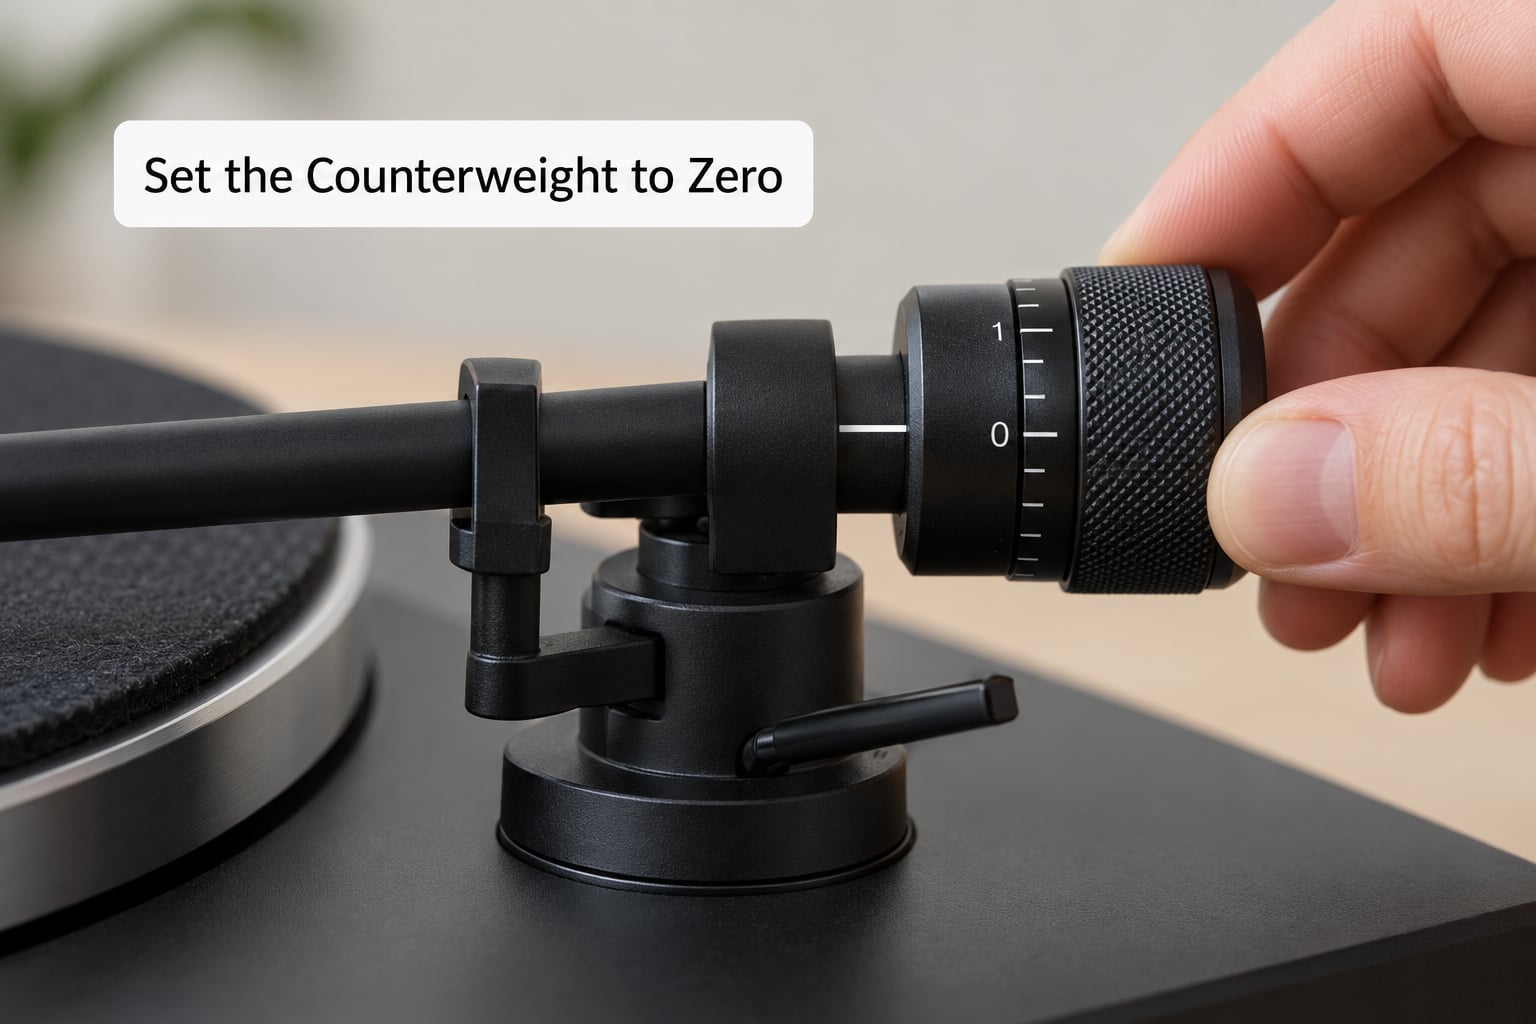
Hold the tonearm at its pivot with one finger so it cannot move, then let go. The arm should float: stay wherever it was released, neither rising nor dropping.
If it sinks or climbs, twist the counterweight a fraction of a turn until it floats level. This is the balance point, and here is why it comes first: the headshell, the wiring and the cartridge together weigh far more than the counterweight does, so the arm is net top-heavy until the counterweight is wound up to cancel them. Zero means the arm’s own weight is neutralised and every gram you add afterwards is force pressing down on the record.
Float the arm on a spirit level or your judgement, not on a record.
Safety note: never drag the stylus across the record or the rubber mat while adjusting the balance. Audio-Technica states it plainly in its AT-LP8X documentation, and the reason is obvious once you think about it. The cantilever is a tiny piece of metal with an even tinier tip glued to it, and a sideways drag across a mat is the single easiest way to snap it.
4. Set the Tracking Force
Put the record on the platter, or lay the gauge on the record itself so it reads at the same height the stylus will meet. Lift the arm over the gauge and lower it so the stylus sits on the reading point.
Now rotate the counterweight ring itself, not the whole weight, and turn in small increments while watching the gauge. Lock the collar once you reach your target number, then lift and re-check, because the reading often shifts a fraction during the lock.
If you are using the arm’s own scale instead of a gauge, read the scale the same way: float to zero first, then rotate until the scale index matches the number the maker equates to your target force. That is exactly what the supplied 23-mark gauge on a Pro-Ject is for. It is less precise than a digital gauge but lands inside the manufacturer range, and inside the range is the goal.
VinylEngine regulars generally prefer a gauge, with the counterweight sitting mid-shaft, over trusting dial markings alone. Either approach works, provided you know which one you are using.
5. Check Cueing, Playback and Skidding
Remove the gauge, replace the arm on its rest, then cue slowly at the outer edge of a record with the arm lift. The stylus should touch down and stay down.
Listen through the first minute of a side you know well. Smooth, even movement with the band centred is what you are after.
- Slight skid or a jump at the start usually means a touch too little force, or a worn stylus.
- The arm floats up and sits back on itself means too much force.
- Distortion that appears on quiet passages and fades on loud ones points to the force being slightly light for that cartridge.
If it is off, move the ring a fraction of a turn at a time and repeat the test. For most people the correct answer is that if the number sits inside the maker’s range and the record plays without skidding, leave it alone. Forum consensus on this point is unusually consistent.
If Your Turntable Has No Counterweight
Linear-tracking DJ decks and budget fixed-headshell tables leave a lot of people stuck, and the question is a common one over on r/turntables. There is no counterweight ring to rotate, so the adjustment lives elsewhere.
On a direct-drive DJ deck the force is usually set by a small adjustment screw or by the ring weight that sits on the back of the arm, and the deck has its own calibrated scale. Read that scale from the manufacturer’s manual and set the force at the rear end of the arm rather than the side.
To measure rather than trust the scale, remove the platter and place your gauge on a record so the stylus reads at the correct height. One approach discussed on Audiokarma is to unplug the deck with the arm lowered and take a reading without the motor dragging the arm around, though on many modern decks the power-failure lift stops you before you get a number, which is why the platter-off method is the reliable one.
Do not test an unknown force by playing a record loudly enough to hear the arm strain. That wears the stylus and the grooves to prove something a gauge answers in ten seconds.
Common Mistakes
Almost every tracking force problem I get asked about comes down to one of these.
Rotating the counterweight before balancing the arm. This is the big one. Without a zero reference, the scale reads a number but the number means nothing. Fix: float the arm to level first, every time.
Reading the tonearm scale as grams. The scale is calibrated per arm, and the numerals are indices, not weights. Fix: check the manual for the force each mark corresponds to, or use a gauge.
Checking the force with the arm lifted. A raised arm is not applying its normal force, so the reading means little. Fix: lower the arm onto the gauge before you read anything.
Adjusting with the stylus on a record. Even a small sideways slide can damage the cantilever. Fix: gauge on the platter or on the record, straight down, nothing dragging.
Ignoring a worn stylus. A blunt tip needs more force than a sharp one, so you end up heavier than spec and blame the cartridge. Fix: check the stylus under magnification or replace it, then reset.
Forcing the arm across the record. Guiding the arm by hand while it plays creates lateral pressure and mistracking. Fix: use the cueing lever and let the arm track itself.
Here is what too little and too much actually feel like, so you can tell which direction you need to move.
| Symptom | What it usually means | What to do |
|---|---|---|
| Stylus skids or jumps at the start of a side | Force too low | Add a tenth of a gram, then re-test |
| Arm drifts inward and sits back over itself | Force too high | Back the ring off and re-check |
| Distortion in quiet passages, clean on loud ones | Force slightly low for the cartridge | Move toward the top of the maker’s range |
| Muddy, compressed high end | Force above the maker’s range | Return inside the range and give it a listen |
| Uneven wear on one side of the groove | Anti-skate too high | Lower anti-skate toward the force value |
| Consistent inward drift during a side | Anti-skate too low | Raise anti-skate to match the force |
Typical ranges by cartridge and stylus type, so you have a number to aim at while you find your cartridge’s sheet.
| Cartridge or stylus type | Common tracking force range | Examples |
|---|---|---|
| MM with conical tip | About 1.5 to 2.0 g | Ortofon 2M Red, Nagaoka MP-110 (1.5 to 2.0 g), AT-VM95C |
| MM with elliptical tip | About 1.75 to 2.5 g | Ortofon 2M Blue, Audio-Technica AT-VM95E (1.5 to 2.0 g) |
| MM with fine-line tip | About 2.0 to 2.5 g | Ortofon 2M Green |
| MM with line-contact tip | About 2.5 to 3.0 g | Ortofon 2M Blue Nude |
| Low-output moving coil | About 1.8 to 2.5 g | Moving-coil cartridges in the Rega Planar and Pro-Ject Debut PRO range |
| High-output moving coil | About 2.0 to 3.0 g | Moving-coil cartridges specified for direct phono inputs |
Anti-skate comes last, once tracking force is settled. Most manuals say to set it to the same value as the tracking force, and that is the right starting point. Set it too low and the arm skates inward and can scratch; set it too high and the arm pulls outward harder than the geometry wants, which shows up later as uneven wear on one side of the groove.
Re-check tracking force whenever something changes: moving the turntable to a new surface, fitting a different headshell, mounting a new cartridge, or replacing the stylus. A heavier cartridge needs more counterweight travel and a fresh zero. Record the number you land on and the cartridge model, and the next swap takes two minutes instead of an hour.
Frequently Asked Questions
What is a good tracking force for a turntable?
Most moving-magnet cartridges with conical or elliptical tips want roughly 1.5 to 2.5 grams, fine-line and line-contact moving-magnet tips sit around 2.0 to 3.0 grams, and moving-coil cartridges usually fall between 1.8 and 3.0 grams. Treat those as orientation only. The cartridge maker’s printed range is the number that counts, and any value inside it is correct.
What happens if the tracking force is too light?
The stylus rides up the groove wall instead of sitting in the bottom of it. You get tracking error at its worst, which shows up as distortion on quiet musical passages, a loss of bass, and the occasional skid or jump when the arm crosses a worn section. It also makes the arm more likely to skate inward.
What should counterweight be set at?
The counterweight has no absolute setting of its own. Wind it up until the tonearm floats level with anti-skate at zero, then rotate the ring in small increments until a gauge reads your cartridge’s recommended force. The counterweight position is just the mechanism; the gram weight on the stylus is the only value that means anything.
What should my anti-skate be at?
Set it to the same gram value as your tracking force, as the turntable manual instructs. Too low and the arm drifts inward and can scratch records. Too high and it pushes outward harder than the arm geometry intends, which tends to show up years later as uneven wear on one side of the groove.
Does a turntable have to be perfectly level?
Not perfectly, but it should be close. A noticeable tilt pushes the tonearm sideways, increases tracking error, and makes your tracking force readings harder to repeat. Most turntables have adjustable feet, so use them rather than a shim under the back edge. A spirit level on the platter takes about a minute to check.
Do I have to reset tracking force for every record?
No. Set it once for your cartridge and leave it. New records of the same pressing do not need different settings. Reset only when the cartridge, headshell or tonearm changes, when you replace the stylus, or when the deck moves to a different surface and sits differently.
Conclusion
Start by finding your cartridge’s recommended tracking force and writing the number down. Balance the tonearm to zero so the dial has a reference, then dial the force inside that range and confirm it by listening to a side you know.
Keep the cartridge manual somewhere you will find it. Every time the tonearm or cartridge changes, the whole process takes ten minutes, and it is worth redoing in 2026 rather than trusting a setting another owner left behind.