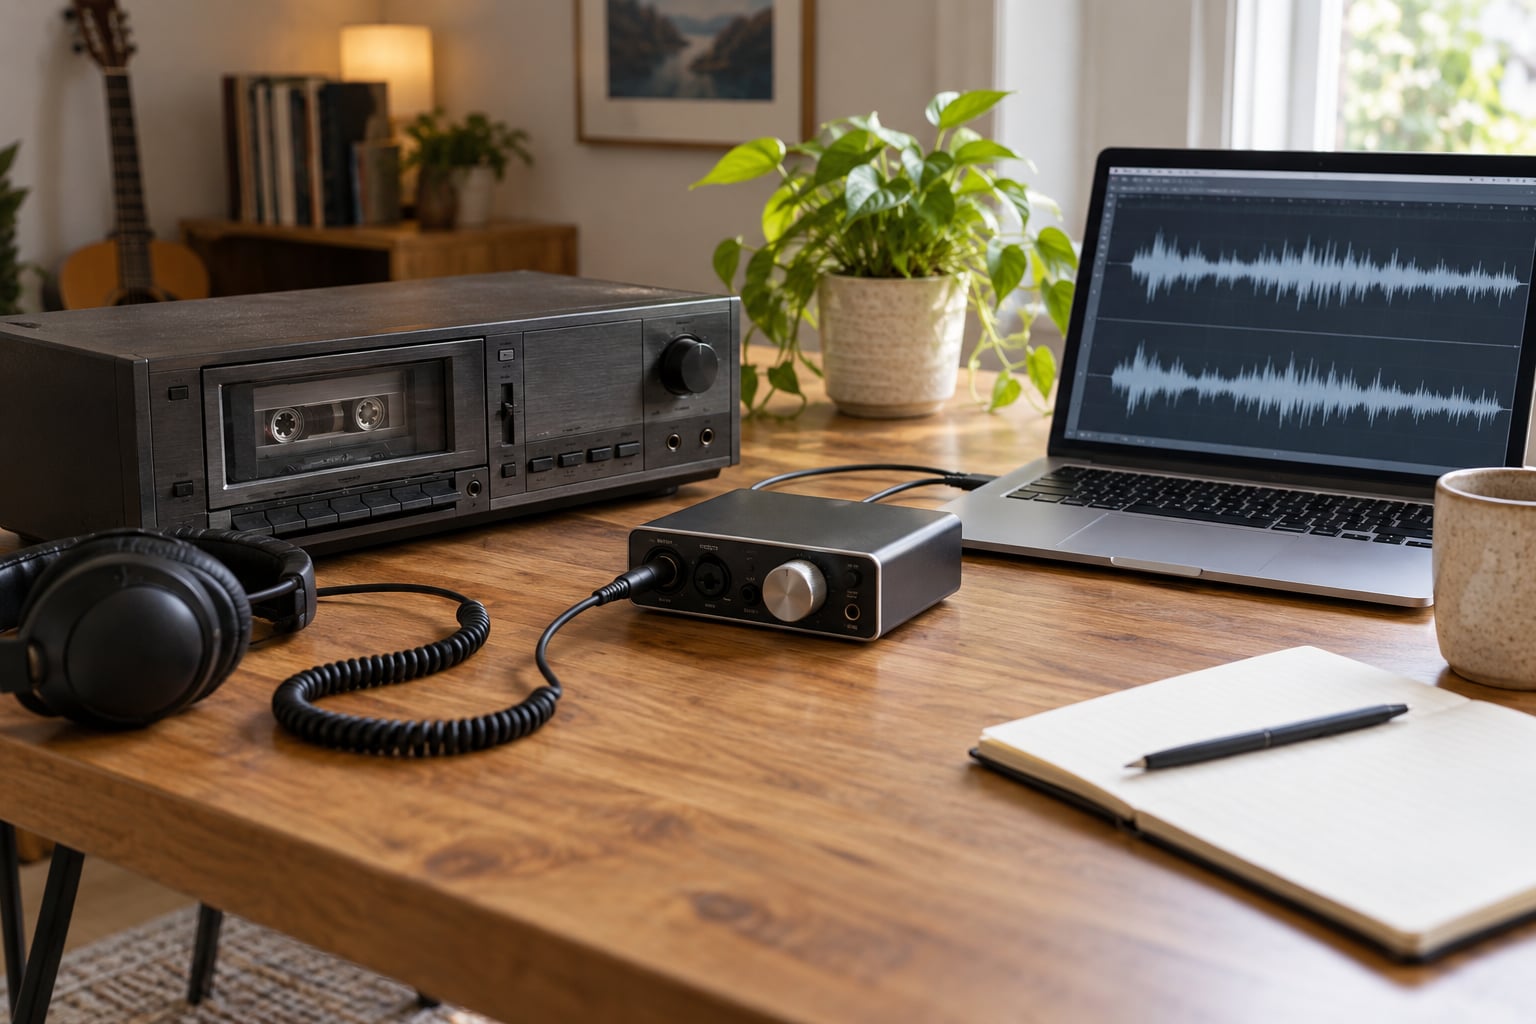
To digitize cassette tapes at home, you connect a cassette player to your computer with an audio cable or a USB audio interface, play the tape in real time, and record it with free software such as Audacity. A transfer takes about as long as the tape runs, so budget 45 to 90 minutes per side plus ten minutes of setup. It is a simple job, but two things catch almost everyone: input levels set too hot, which clip on loud passages, and hum picked up from cheap cables.
Both problems are easy to fix once you know what caused them, and the rest of this guide walks through the whole job: picking the deck output, connecting it without frying anything, setting the levels, cleaning up the audio, and keeping copies of the files where they will survive. Updated for October 2026.
One thing worth knowing before you start: a cassette is a consumable medium. Every playback wears the oxide a little thinner, and heat and humidity speed that up. Digitizing is cheap insurance against a family recording or a mixtape dying in a sticky transport, a chewed leader, or a damp garage.
Table of Contents
- What You Need to Digitize Cassette Tapes at Home
- Step-by-Step
- Choose the Right Cassette Deck and Connection
- Set Up the Recording Software or App
- Clean and Identify the Cassette
- Digitize the Tape at the Right Level
- Stop Recording and Save the File
- Name, Organize, and Back Up the Files
- Common Mistakes and How to Fix Them
- Frequently Asked Questions
- Can I digitize a cassette with a basic tape player?
- What is the best free software for digitizing cassette tapes?
- Can I use my phone to record a cassette instead?
- Should I remove hiss and background noise after recording?
- Should I throw away the original cassette after digitizing?
- Conclusion
What You Need to Digitize Cassette Tapes at Home
Four items, and you probably own three of them already:
- A cassette deck with an audio output. Look for line out or record out (the red and white RCA jacks) first, then a headphone jack. Anything labeled playback-only is fine, since you are recording to your computer and not back to the tape.
- The matching cable, or a USB audio interface. For RCA outputs you need a stereo RCA-to-3.5 mm cable, or an RCA-to-USB interface if your computer has no line input. A USB audio interface with a real line input is the better buy.
- A computer. Any laptop or desktop from the last fifteen years works. Speed barely matters here; the recording happens as fast as the tape plays.
- Recording software. Audacity is free, open source, runs on Windows, macOS, and Linux, and does everything you need. Voice Recorder on Windows and QuickTime on a Mac can capture a raw take too, with less control.
Line out beats headphone out because it is a cleaner, higher-level signal with no volume control in the way. If your deck only has a headphone jack, that still works; just turn the deck volume up enough to get a healthy signal and expect a touch more distortion. You do not need a flat-presence or expensive audiophile deck for a good transfer, though a deck with a working transport matters far more than one with a fancy specification sheet.
Skip the computer’s microphone input if you can. Mic inputs apply heavy gain to a weak signal, which lifts hiss along with the music, and laptops often tie them to a mono mic, which throws away half of a stereo recording.
All-in-one USB cassette converters exist and are cheap, and people on r/cassetteculture use them happily for mixtapes and spoken-word tapes. For music collections I would put the money into a decent deck and a USB interface instead, which is also the consensus advice on tapeheads.net.
Handy but optional: 90 percent isopropyl alcohol and cotton swabs for the heads, a demagnetizer, a tape splicer for broken tapes, and a short extension lead if your deck sits far from the computer.
Step-by-Step
Choose the Right Cassette Deck and Connection
Turn the deck around and read the jacks before you unbox any cables. Line out and record out are the same thing on a playback deck: a stereo pair, white for one channel, red for the other. Line in and record in are inputs for recording onto tape, and you can ignore them.
Match the cable end to the output. RCA out to a 3.5 mm line input on the computer takes an RCA-to-3.5 mm cable. RCA out to a USB interface takes the cable that shipped with the interface. Headphone out to a computer line input takes a plain 3.5 mm aux cable.
Plug the cable in and leave the deck volume at zero for now. If the hum appears once you connect, try a different cable before you change any software; a cable with a broken shield is the usual culprit. Keeping the cable off the floor and away from power supplies helps too.
Set Up the Recording Software or App
Install Audacity from audacityteam.org, then open it. In the device toolbar at the top, use the Audio Setup menu to open the settings dialog and choose your recording device: the USB interface if you have one, otherwise the line input on your sound card.
Set the sample rate and bit depth in the same dialog. For most cassette material, 44.1 kHz and 16-bit is the minimum sensible choice, and 48 kHz with 24-bit gives you headroom to clean up later. Both are widely supported, so you cannot really go wrong.
Audacity shows a live meter when you record, which is the important part. Do a ten-second test: hit record, play something loud, watch the meter, stop. That one test tells you whether the connection works and whether you are clipping before you commit to a 90-minute transfer.
OBS works if you prefer a familiar streaming-style interface, since its desktop audio capture records any input device. A phone voice recorder is a workable stopgap, but phone microphones are not built for line-level signals and add their own noise.
Clean and Identify the Cassette
Pop the deck open and look at the pinch roller and heads. If they look shiny with grime, a cotton swab and a little isopropyl alcohol will improve the transfer more than any cable you can buy. Wipe the head, the capstan and the roller, let it dry fully, and close the door.
Hold the cassette up to the light. Check that the tape is wound tightly against the hub on both sides, that the leader is seated in the shell, and that nothing is loose inside. Look at the front edge for a crack or a bent flange, which is what shell shock looks like.
Run the tape once from side to side before recording, listening for a wobble, a scrape, or a skip. If the transport struggles, stop. Forcing it can snap the tape or stretch it beyond recovery, and a stuck deck is how a salvageable recording gets destroyed.
Write down the tape’s title, the side, the date if you know it, and the run time before you start. Scraping that off the shell after the file is saved is when you forget it.
Do not demagnetize a tape you intend to record from in the near future. A demagnetizer erases recorded content along with the stray fields, so it belongs on an empty shell you are cleaning, not a tape with music on it.
Digitize the Tape at the Right Level
Hit record first, then press play on the deck, and let it run. There is no way to speed this up: a 90-minute tape takes 90 minutes of wall-clock time, and a shelf of 200 tapes is a multi-week project. Plan for it rather than fighting it.
Now watch the meter for the first thirty seconds. Peaks should reach roughly -6 to -12 dB on Audacity’s scale. If the red clips and the waveform flattens into a solid block, the loudest passage on the tape is being crushed.
Lower the gain rather than hoping. On a USB interface that means the gain knob or the level slider; in Audacity it is the input slider next to the meters. The fix people on r/WeAreTheMusicMakers repeat most often is simple: back the gain off until the loudest hit has room, then stay there. Crushed dynamics cannot be repaired in software.
On the old decks, matching Dolby matters. If the tape was recorded with Dolby B noise reduction, switch Dolby B on for playback, or the high end will sound dull and the noise will seem worse. Dolby C material needs Dolby C. Record the output with noise reduction off, because the filtering is a playback artifact and bakes hiss-like warble into your file if you capture it.
Leave the deck running for two or three seconds after the tape ends, then stop. That trailing silence gives you room to trim cleanly at the end.
Stop Recording and Save the File
Press stop, then zoom into the waveform and scroll through. Look for flat-topped blocks, which mean clipping, and for a long flat line, which means the transport skipped or the cable popped out. If you see either, rewind and repeat that side with less gain.
Save a lossless master before you touch anything. Choose File, then Export Audio, and pick WAV at the sample rate you recorded at. Audacity can also write FLAC, which compresses losslessly and is easier to live with on a big collection.
MP3 makes sense as a second copy for phones and cars, but keep WAV or FLAC as the version you would rebuild from. Audacity and the free MP3 encoder it ships with handle this well; make the MP3 last so any editing mistakes are never baked in.
If the source tape is noisy, a second pass with the deck or the tape rethreaded often sounds noticeably better. Users on r/cassetteculture and tapeheads.net both recommend transferring damaged material two or three times and keeping the best take.
Name, Organize, and Back Up the Files
Rename the file before you do anything else, while the shell is still in your hand. A workable pattern is artist, then title, then side and year: something like ambivalence-live-1994-sideA.wav. Leading date and catalog numbers sort more usefully than anything else once a folder gets past a few dozen files.
Keep one folder per batch rather than per tape, named for the source: shoebox-1994, family-recordings, festival-tapes. Inside, keep masters and exported copies in separate subfolders so you never overwrite a master with a lossy version by accident.
Keep at least two copies of everything, and put the second one somewhere you do not think about daily. A backup on the same drive as the original is a copy, not a backup. Once your masters exist, an external drive plus cloud storage is plenty.
Then put the cassettes themselves somewhere sensible: upright in their cases, out of direct sunlight, somewhere dry and reasonably temperature-stable. Digitizing does not make the originals worthless, and a physical tape is still the only copy that cannot fail from a corrupted file or a deleted account.
Common Mistakes and How to Fix Them
Nearly every bad cassette transfer traces back to one of these:
- Hiss that sounds like static. Often the tape, not your gear. Record a five seconds of silence from a stopped tape and compare; if the file is quiet too, it is the deck’s electronics. Clean the heads and pinch roller first, and only then try Audacity’s noise reduction on a duplicate of the file.
- Constant hum. A 50 or 60 Hz buzz usually means a ground loop or a poor cable. Swap the cable, plug the interface into a different port, and try a laptop on battery power. Laptops on battery are a fast way to prove whether the supply is the problem.
- Clipping on loud passages. Back the input gain off until the loudest hit sits below 0 dB, then record again. Silence and quiet passages end up quieter, which is exactly what normalization is for later.
- A recording so quiet it is hard to hear. The deck volume is probably at zero or the wrong input was selected. Raise the deck’s own output level and check that you are recording the line input and not the microphone input.
- Only one channel of stereo. Usually the computer is set to mono recording, or a mono 3.5 mm cable is carrying one channel. Set the recording channels to 2 and use a stereo cable end.
- Channels swapped. The red and white RCA plugs are reversed, or the cable is wired backwards. Swap them and check a known stereo source.
- Playback sounds too fast or too slow. Some decks have a speed selector left on the wrong setting. Set it to the tape’s normal speed and make sure your software is not doing any playback-rate correction.
- Clicks and pops mid-recording. Usually a tape transport issue, sometimes a dirty head. Clean the deck, run the tape once through without recording, and if the clicks persist at the same spot, expect a splice or a damaged section and re-record around it.
- The recording captured your computer instead of the tape. You selected the wrong input device. Reopen the audio setup and pick the interface or line input rather than the default device.
A few habits that smooth out most transfers: test-record ten seconds of the loudest track on the tape before committing, do the quiet tracks on the same settings so you keep one gain setting per session, and never record over the top of an existing file.
Also know the ceiling. A worn-out 1993 tape that already has hiss and a thin high end will sound the same no matter what you spend on hardware. The chain you build can avoid adding problems; it cannot invent detail the recording never had.
On legality, digitizing a home recording or a tape of your own band’s show for your own listening is straightforward. Copying a commercially released recording to share or sell is a different matter and can infringe copyright, so keep personal archives personal.
Frequently Asked Questions
Can I digitize a cassette with a basic tape player?
Yes, as long as the player has an audio output such as a headphone jack or an RCA line out. Plenty of cheap players play tapes but offer nothing to record from, so check the jacks before buying anything. Headphone output works fine, though you will need the volume turned up and it adds a little distortion. A line out on a small deck is quieter and cleaner, so prefer it when one exists.
What is the best free software for digitizing cassette tapes?
Audacity is the best free option and the one most guides recommend. It records from the deck or interface, shows a live waveform so you can spot clipping, and handles trimming, noise reduction, normalization, and export to WAV, FLAC, or MP3 in one place. Windows Voice Recorder and macOS QuickTime can capture a take too, but they give you far less control over levels and cleanup.
Can I use my phone to record a cassette instead?
A phone can work, especially with a USB or Lightning audio interface that gives you a proper line input. What does not work well is pointing the phone microphone at a deck playing out loud, which captures room noise and picks up hiss you would never get from a wired connection. People do use a digital voice recorder fed from the headphone jack as a budget stopgap, but treat it as a fallback rather than the reference chain.
Should I remove hiss and background noise after recording?
Remove only obvious hiss, clicks, and rumble, and do it after saving your untouched master. Heavy noise reduction thins out cymbals, guitars, and sustained vocal notes, which is how a clean recording turns into an artifact-fest. Work on a duplicate, keep the settings light, audition several passes, and remember that tape hiss is partly the source material and honestly does not need to disappear completely.
Should I throw away the original cassette after digitizing?
No. Keep the original in its case, stored upright somewhere dry and out of direct sunlight, with moderate, stable temperatures. It costs nothing to keep and it stays the last resort if your digital files are ever lost or corrupted. Once you have a verified WAV or FLAC master plus a second copy elsewhere, the tape is no longer urgent, but it is still the physical master of the recording.
Conclusion
Start by looking at the back of your cassette deck and naming the output you actually have: line out, record out, or headphone jack. Match the cable to it, plug into the line input of a USB audio interface, open Audacity, and record ten seconds of the loudest track on the tape while watching the meter.
If the peaks stay below zero, let the whole side run and save a WAV or FLAC master. If they hit the ceiling, drop the input gain and try that side again before you lose an hour to a clipped recording.
Then label the file, put it somewhere with a second copy, and keep the cassette itself in its case in a dry spot. That is the whole job, and once the first transfer is done the rest of a collection is just repetition.