Knowing how to maintain a drum kit takes about an hour of work spread across a week, and it protects the loudest part of your gear. The short version: wipe shells and cymbals after every session, check heads and hardware weekly, and give the whole kit a real clean once a year. Most kit problems start as something small you noticed and ignored.
Drums do not wear out in one dramatic failure. Grime builds up on the shells and dulls the finish, sweat attacks the chrome hardware, and moisture trapped inside a wooden shell slowly bends it. Heads stretch, bearing edges lose their square, and tuning drifts a quarter-tone at a time until the kit sounds vaguely wrong and nobody can say why.
This guide covers the whole kit in one place: shells, hardware and tension rods, drum heads, bearing edges, hoops, cymbals, pedals and storage. It is written for home drummers, students and band members who want a sensible routine without specialist tools, and it is current for 2026.
Table of Contents
- What You Need
- Step-by-Step Drum Kit Maintenance
- 1. Inspect the Kit and Identify Problems
- 2. Clean the Shells and Hardware
- 3. Check and Replace Drum Heads
- 4. Tighten Hoops, Lugs, and Stands
- 5. Tune the Drums for a Stable Response
- 6. Service the Pedals and Cymbals
- 7. Store the Kit Correctly
- Common Mistakes
- Frequently Asked Questions
- Can I use WD-40 to clean my cymbals?
- Can you use Windex on drum heads?
- How often should I replace drum heads?
- How long does a cymbal last before it needs replacing?
- Should I oil my drum hardware and tension rods?
- How do I stop my drum shells from warping?
- Conclusion
What You Need
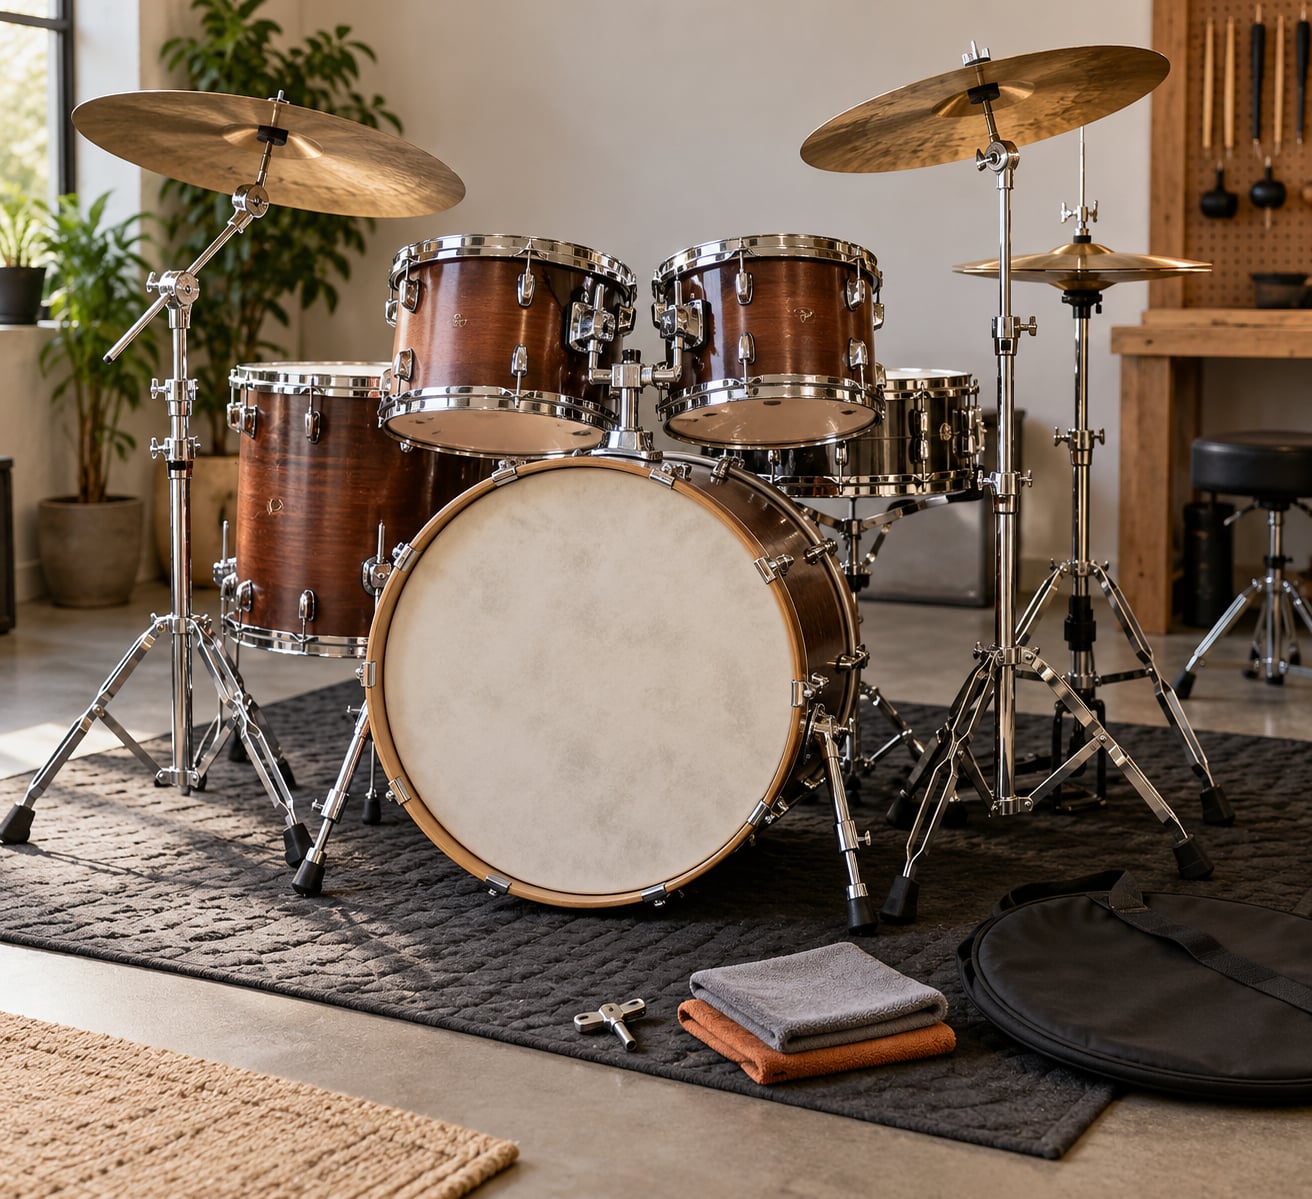
A drum key and a set of soft cloths will get you 80 percent of the way. Everything else on this list is cheap insurance against finish damage, rust and stuck hardware.
Essential for every session:
- A drum key with sockets that fit your tension rods. Square-headed rods need a square socket, and modern keyed heads need the keyed slot, so a multi-size key saves frustration.
- Two or three soft microfiber cloths. Keep one for cymbals and one for shells so you are never dragging grit across a gloss finish.
- A soft brush, either a drum shell brush or an unused soft toothbrush for lug casings and shell interiors.
Useful once a month or for a proper clean:
- 0000 wire wool for chrome hardware and steel hoops with light surface rust. Nothing coarser, and never near a lacquered shell.
- A drum key socket set with swivels, plus a spare pack of tension rods in the three lengths you use most.
- Cymbal cleaner. Acid-free, non-abrasive, and safe on both brilliant and traditional finishes.
- A drum head collar or hoop protector ring so the hoop does not bite into the head collar when you tighten.
- Bearing edge conditioner or plain beeswax for conditioning the edges after cleaning.
- White spirit for stripping old grime off metal hardware, used outdoors or with ventilation.
- Small parts trays or a single labelled container. A baked-bean tin with a strip of masking tape and a Sharpie label keeps every swivel nut accounted for during a lug removal.
Occasionally useful:
- A Falam patch, a self-adhesive reinforcing patch that stops a small tear from becoming a ruined head.
- Lithium grease for pedal mechanisms and spring assemblies. Keep it away from the tension rods unless you have read the section below.
- Hoop and cymbal sleeves if you move the kit between venues.
Here is the routine the steps below fit into:
- After every session: wipe heads, shells, cymbals and hardware with a dry microfiber cloth, and put the cymbals in their bag or sleeve.
- Once a week: inspect heads, listen for rattles, check the pedal and hi-hat for play or squeak, and spot-tighten anything loose.
- Once a month: clean shells, bearing edges and hardware, and check the tuning.
- Every six months: replace the resonant head on your snare, check the pedal felt and chain, and deep-clean your cymbals.
- Once a year: full disassembly, remove every lug, clean inside the shells, condition the bearing edges, and treat the hardware.
Step-by-Step Drum Kit Maintenance
Work through the kit in this order: inspect first, so you know what you are dealing with, then clean, then adjust, then store. Doing it in a sensible sequence means you are not putting a clean head onto a dirty bearing edge and wondering why it still sounds wrong.
1. Inspect the Kit and Identify Problems
Start by looking at every component rather than cleaning straight away. A ten-minute inspection tells you which parts need attention and which are fine, and it prevents you from wiping dirt deeper into a scratch you were about to fix anyway.
- Run a finger around each bearing edge in the shell. Any burr, flat spot or chalky roughness needs addressing before anything else.
- Look at heads under a light source. Look for dents around the hoop, wrinkles radiating from the collar, a cloudy or chalky surface, and tear-out near the edge.
- Tap each head gently and listen. A dead, flappy note or a rattling one usually means a loose or failed muffling ring, not a bad shell.
- Check hoops and claws. Look for a rim that sits unevenly, a bent counterhoop, or a claw whose spring has gone soft so the head falls slack.
- Run every stand and boom through its full range. A joint that slips under load needs tightening now, not mid-gig.
- Look at cymbals for stick marks, keyholing around the centre hole, hairline cracks and bell thinning.
- Work the bass drum pedal and hi-hat. Play them. Any grind, squeak or sluggish return is a lubrication job, not a replacement.
You know the inspection worked when every problem is on a list rather than in your head. That list is what the rest of the routine is built from.
2. Clean the Shells and Hardware
Cleaning shells means removing sweat and grime with a product matched to the finish, using soft circular motions and a clean section of cloth for every drum. The wrong cloth on a glossy lacquer is the single most common way people ruin a kit that still looks new.
- Lacquer finish: a damp microfiber cloth with a little mild furniture polish. Never use a nylon or polyester cloth, which can scratch a glassy lacquer permanently.
- Wrap finish: a barely damp cloth and nothing abrasive. Most wraps do not tolerate polish or solvent.
- Raw or natural wood shell: dry or very lightly damp cloth only, then a thin coat of lemon-oil furniture cream once a year, never silicone-based spray polish.
- Chrome hardware and hoops: 0000 wire wool for patches of surface rust, finished with a dry cloth. Autosol works well on plain chrome.
Disassemble the snare completely for a real clean: throw-off, snare wires, both hoops and both heads off. Then you can see the interior properly, and you can vacuum inside the shells with a brush attachment to catch dust and mouse hair nobody else can reach.
When you put lugs back on, snug the external tension rod first, thread the internal lug case in by hand until it bottoms out, then finish with the drum key. Hand-threading stops the case from cross-threading and stripping as you tighten the outside.
3. Check and Replace Drum Heads
Replace a head when it is dented, wrinkled, torn, chalky or noticeably dead, and put the replacement on evenly so it seats square against the bearing edge. Do not stretch heads over hoop and lug tension by hand; a collar makes the job faster and safer.
- Mark the top of the existing head with a Sharpie so you can line up the new one the same way and keep the same tuning reference.
- Fit a drum head collar around the counterhoop. This keeps the lug claws from digging into the collar and puncturing the new head.
- Loosen the tension rods in a star pattern, taking a little off each lug in turn rather than releasing one side at a time. The head comes off evenly and will not stretch on the way down.
- Seat the new head on the hoop, line it up with your mark, and fit the counterhoop and collar back on before you touch the key.
- Tighten in the same star pattern a quarter turn at a time. Work each lug a few degrees at a time, going around more than once, so the tension spreads evenly.
- Let the head settle, then tune it. A new head will drop slightly as it stretches over the first hour or two of playing.
If a head gets a small tear, a Falam patch over the damaged collar area buys you months instead of replacing it. Anything near the bearing edge area or larger than a coin means the head goes in the bin.
4. Tighten Hoops, Lugs, and Stands
Tighten hoops, lugs and stands in small, even increments in a star pattern, and stop as soon as the head stops moving under your palm. Drum key tension is easy to overestimate; most shell damage in a home kit comes from a few over-tightened claws.
- Fit hoop protector rings or patches where the claw meets the collar if your claws have sharp edges.
- Tighten each lug a quarter turn at a time, moving around the drum in a star pattern, never clockwise twice.
- Set both hoops to the same reference line so the head seats straight. A visible gap on one side of the hoop means the head or the hoop is not square.
- Check that the batter hoop claws line up with the counterhoop claws. Mismatched claws are a common second-hand kit problem and cause uneven seating and slow tuning drift.
- Tighten stand and boom joints until they hold position, then give each one a deliberate load test.
- Check bass drum spurs and clamps. A loose spur turns a hard floor into a damaged floor.
How you know it worked: press firmly on the batter head between two lugs. If the head moves at all under firm hand pressure, it is not tight yet. If the shell creaks as you tighten, you have gone too far.
5. Tune the Drums for a Stable Response
Tune by ear with the drum key, starting the tuning process from the lug opposite the one you adjust, and making every adjustment smaller than you think you need. Small increments and multiple passes are what produce a stable, even tension across the head.
- Seat the drum at a comfortable playing height, then damp it lightly with your palm or a small patch and listen for an even note all the way around.
- Turn one key with the drum facing you, then check the opposite lug. Move to the lug at the 90-degree mark, and finish at the remaining one.
- Make adjustments at about a quarter turn. If the drum is going flat as you listen, every change should be tiny and in the same direction.
- After every pass, play the drum. Tuning by tapping alone lies to you, especially on a rack tom with a ring.
- Tune to your kit, not to a reference. A tom three or four semitones above the snare is a working relationship that fits most players.
- Re-check tuning after the first ten minutes of playing. Fresh heads and warmed-up hoops will have moved slightly.
If tuning will not hold, the cause is usually a dry or rusty tension rod, a dented head, or a bearing edge that is no longer square. Fix the cause before tuning again.
6. Service the Pedals and Cymbals
Bass drum pedal, hi-hat and cymbals need less than most people expect: wipe them, lubricate the moving parts, and replace worn felt and wing nuts. Squeaks and sluggish action come down to one dirty pivot or an empty oiling port.
- Wipe the footboard, hoop clamp and beater shaft. Salt from sweat is what turns a chrome shaft into sandpaper.
- Put one drop of lithium grease or valve oil on the swivel joint and the heel plate hinge. Skip the throw-off spring on many modern drives; lubricating it can make a trigger less crisp.
- Hit the pedal twenty times slowly. No grind, no squeak, no sticking.
- Clean cymbal felts and the underside of cymbal sleeves, and tighten wing nuts a quarter turn at a time.
- Hold cymbals by the edge, never the bell, and clean them on a padded surface with gloves on if you use a solvent.
Cleaning removes dirt and grime. Polishing removes metal, and that is what restores brilliance on a brilliant finish. A cymbal with a traditional finish only needs cleaning; polishing it cuts into the lathing and permanently changes the tone. Many players deliberately keep the darker patina because they prefer how it sounds.
To clean: apply cleaner to a microfiber cloth rather than the cymbal, work in from the bell outward following the lathing lines, rinse or wipe off the residue, and dry with a separate clean cloth.
To polish: work in small sections with an abrasive polish, let it haze, then buff off with a clean cloth. Test a hidden area first, and never wire-brush or use abrasive pads on a cymbal.
If the bass drum pedal clamps have lost grip, the felt or rubber has hardened. Replace the clamp material rather than tightening harder, and check the hoop claw position so the drum sits centred.
7. Store the Kit Correctly
Store the kit somewhere dry, at a stable temperature and out of direct sun, and treat humidity as the main threat. Wood and chrome both suffer more from swings in moisture than from ordinary wear.
- Aim for roughly 40 to 60 percent relative humidity. Steady conditions matter more than the exact number.
- Avoid attics, garages, sheds and unheated rooms, where a hot day followed by a cold night will warp shells and rust hardware.
- Keep drums padded and off the floor. Place them on stands or a rug, not on bare concrete.
- Store cymbals vertically in individual bags, with the bell resting on a soft surface. Never lean them in a tight stack where they can touch.
- Keep hoop protectors on fitted hoops, and drop a soft cloth inside empty shells to keep dust out and stop anything shifting inside.
- Loosen the heads slightly on a kit that will sit for a month, because wood keeps moving after the tension comes off.
- Roll drums rather than carrying them by the hoops, and treat hardware bags as checked-in baggage.
For a neglected second-hand kit, work in stages: dry brush off loose dirt, clean one component fully, test it, then move on. Never reach for the harshest chemical first. Mould and heavy grime need time and ventilation more than they need strength.
Common Mistakes
Most kit damage comes from a handful of repeated habits, and every one of them has a simple correction. Here is what goes wrong, why it goes wrong, and what to do instead.
- Using WD-40 on cymbals. It leaves an oily film that traps dust and attracts grime, and it can discolour the surface permanently. Use an acid-free cymbal cleaner instead.
- Using glass cleaner on drum heads. Alcohol dries out coated heads and makes them brittle, cloudy and prone to cracking. Warm water, a damp cloth, or a purpose-made head cleaner only.
- Using steel wool on a lacquered shell. Abrasive metal leaves scratches that cannot be polished out. Reserve 0000 wire wool for chrome and raw steel hardware.
- Using a nylon or polyester cloth on glossy lacquer. The cloth itself contains abrasives and will haze a mirror finish. Use microfiber or an old cotton nappy.
- Polishing a traditional-finish cymbal. You cannot undo it. The abrasive cuts into the lathing grooves and permanently changes the tone.
- Oiling every tension rod without thinking. Some techs argue oil on tension rods encourages the rods to creep and the drum to de-tune over weeks. If you oil them, use very little lithium grease and re-tune often.
- Tightening claws until the shell creaks. That creak is the shell telling you it is being crushed. Stop at firm and no further.
- Cleaning one drum then using the same cloth on the next. You are just spreading grime and micro-scratches across four finishes. Fold the cloth to a clean face each time.
Two habits cover most of the rest: wipe the kit down after every session, and put cymbals away in their bag. Drummers who do those two things consistently find their annual clean takes a fraction of the time.
Frequently Asked Questions
Can I use WD-40 to clean my cymbals?
No. WD-40 leaves a sticky film that traps dust, dulls the cymbal and can permanently discolour the surface, so a cymbal that looked dirty often looks worse afterwards. Use an acid-free cymbal cleaner on a microfiber cloth, wipe in small sections following the lathing, then buff off the residue with a clean cloth. If a cymbal has light surface rust, clean it first and judge whether polishing is worth it.
Can you use Windex on drum heads?
Not on coated heads. Glass cleaners contain alcohol, which dries out the coating and leaves heads cloudy, brittle and eventually cracked. Stick to warm water with a damp microfiber cloth, or a cleaner made for drum heads. If your head has removable gel pads or O-rings, wipe them separately and never soak the head. Replace the head instead of trying to clean it once the coating goes chalky.
How often should I replace drum heads?
Gigging and recording players usually change batter heads every six months to a year, and resonant heads on the snare every six months or two. Casual home players get a year or more, and often keep a head far longer than they should. Judge by sound and condition rather than the calendar: replace a head when it sounds dead or flappy, has a dent under the hoop, shows wrinkles, or has gone chalky and brittle.
How long does a cymbal last before it needs replacing?
A cymbal can last many years if it is cleaned rather than polished. Heavy gigging, stick chippings, a thinning bell and cracking around the centre hole (keyholing) all shorten that. Replace when it cracks, when it flexes out of shape, or when cleaning no longer brings back any brightness. A cymbal with surface spot rust is usually still playable, since rust does not affect the tone the way a crack does.
Should I oil my drum hardware and tension rods?
For pedals, hi-hats and stands, yes: a small drop of lithium grease or valve oil on pivots and the heel plate stops squeaks and wear. For tension rods it is genuinely debated. Yard Gavrilovic, Steve Gadd’s long-serving tech, avoids it because oiled rods can creep and let a drum de-tune over weeks. If you oil them, use very little and re-tune more often. Clean dry rods with a cloth and 0000 wire wool for surface rust.
How do I stop my drum shells from warping?
Keep humidity steady, ideally around 40 to 60 percent relative humidity, and avoid places with big daily or seasonal swings such as attics, garages and unheated rooms. Loosen heads on a kit stored for long periods, do not stand a drum on its shell edge, and support drums on stands or padded flooring. Rapid changes matter more than absolute humidity, so a dehumidifier in a damp room does more good than anything applied to the shell itself.
Conclusion
Start where the biggest problems usually are: check every head for dents and dead spots, run the pedal and hi-hat to find the squeak, and look at the tension rods and hoops for rust or looseness. Those four checks take ten minutes and tell you more than anything else you could do this week.
Then build the routine that keeps it that way: a dry cloth wipe after every session, a proper component clean once a month, and a full strip-down annually. Do that and your kit still sounds like itself in five years, and the next person to hear it will assume it is new.